At a Glance
- Sales rep assignments put the right vendor rep on every account — automatically
- Vendors keep a roster of their reps and the states each one covers
- By default, the platform matches a rep to a retailer by state coverage — zero setup
- Vendors assign every account to a rep in one place: by account, by rep, in bulk, or from a spreadsheet
- Filter AR Aging by rep to see exactly what each rep's accounts owe
- Each rep gets a weekly collections email every Monday with one-tap pay links
- The primary rep is auto-CC'd on settlement and payment emails — no more manual forwarding
What Are Sales Rep Assignments?
Most cannabis vendors have more than one sales rep — often a different rep per state, and sometimes several reps in one state splitting up regions or accounts. Until now there was no clean way to say "this rep handles this specific retailer." Sales rep assignments fix that: they connect the right person to the right account so they stay in the loop on payment and settlement activity — without anyone manually CC'ing them.
The whole thing works on two levels: a roster the vendor maintains, and a per-account assignment that pins a specific rep to a specific retailer. If no one has pinned a rep, the platform figures it out from state coverage. So it just works out of the box, and you only reach for a manual override when you want one.
How ShelfSpace Picks the Rep
For any given retailer, the platform resolves the sales rep in this order:
- Explicit assignment — if a specific rep has been assigned to this retailer's account, that rep is used.
- State-coverage default — if there's no explicit assignment, the platform falls back to the rep (or reps) whose covered states include the retailer's state.
- None — if neither applies, the account simply has no rep attached, and nothing breaks.
For Vendors: Build Your Sales Rep Roster
If you're a vendor, open Settings › Sales Reps in the vendor portal. This is your team's roster. For each rep you can record:
- Name (required)
- Email — where account emails get CC'd
- Phone
- Title — e.g. Territory Manager
- Covered States — the states this rep is responsible for
Use Add Rep to add each person. Covered states are what power the default: any retailer in a state your rep covers will see that rep automatically, with no per-account work on your end. If two of your reps cover the same state, both show up by default until someone pins a specific one to an account.
For Vendors: Assign Every Account to a Rep
Right under the roster, Account Assignments lists every dispensary that buys from you, including ones that are paid up. Each account gets exactly one rep. Assigning a new rep replaces the old one. Work it two ways and switch between them any time:
- By account — every account with a rep dropdown on its row. Unassigned accounts float to the top, so you can see the gaps first. Search, filter by rep, or check a batch of accounts and use Assign to… to move them all at once.
- By rep — each rep's accounts as a list, with Add accounts to hand them more. An Unassigned card shows what's still open.
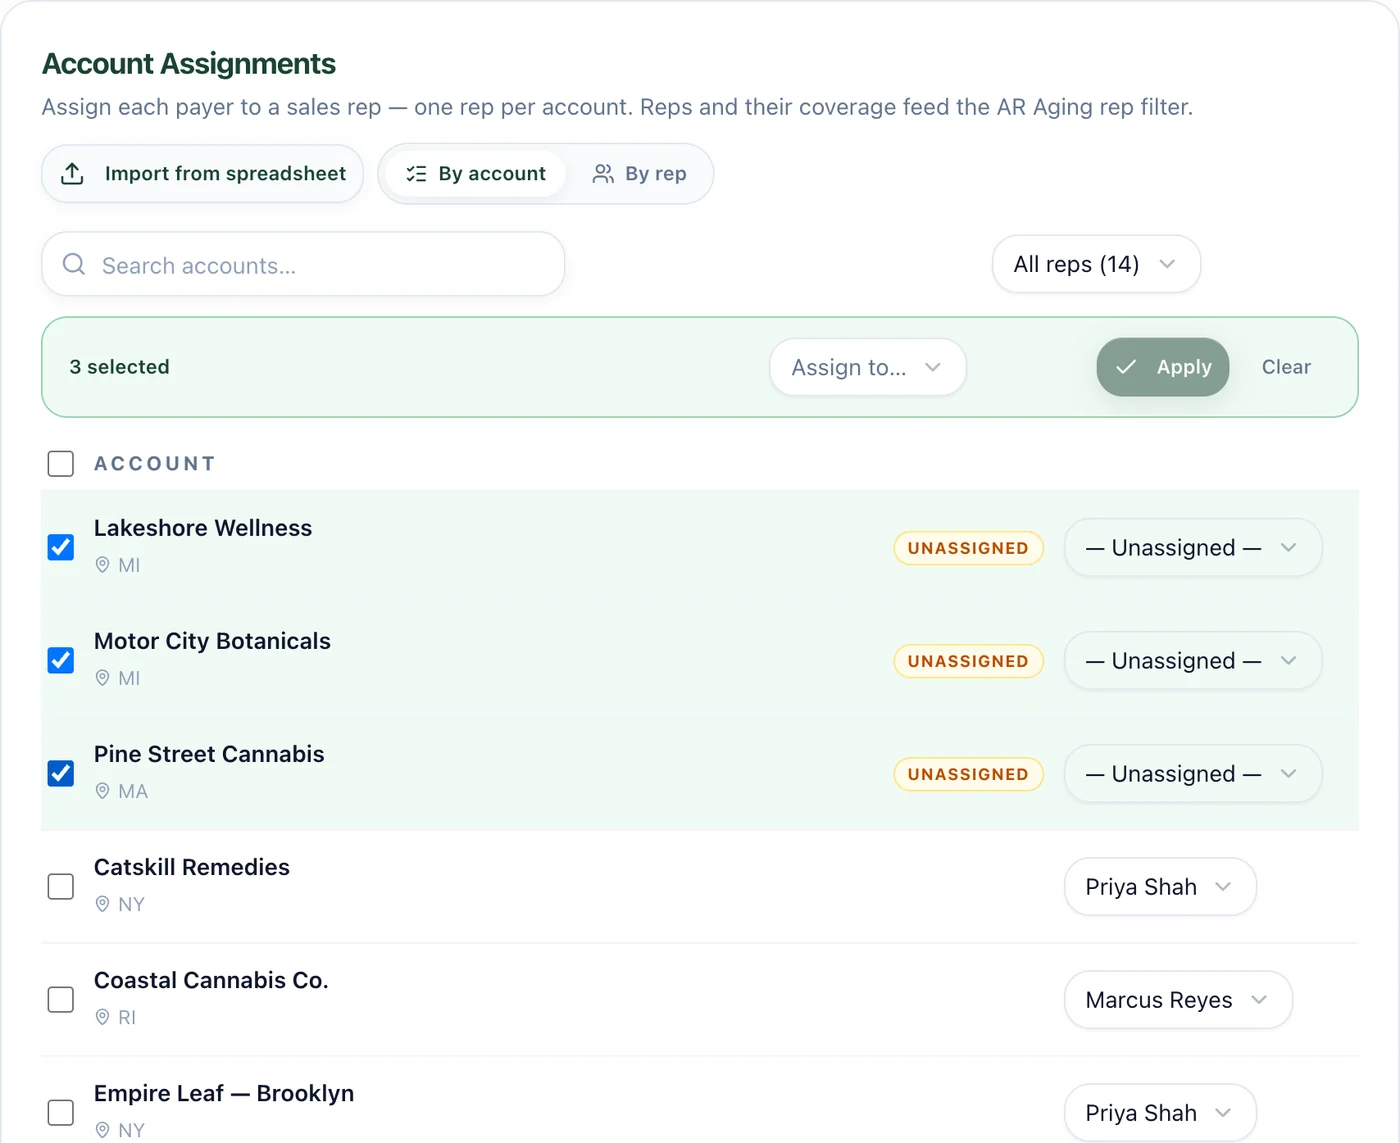
By account: unassigned accounts float to the top. Select a batch and assign them at once.
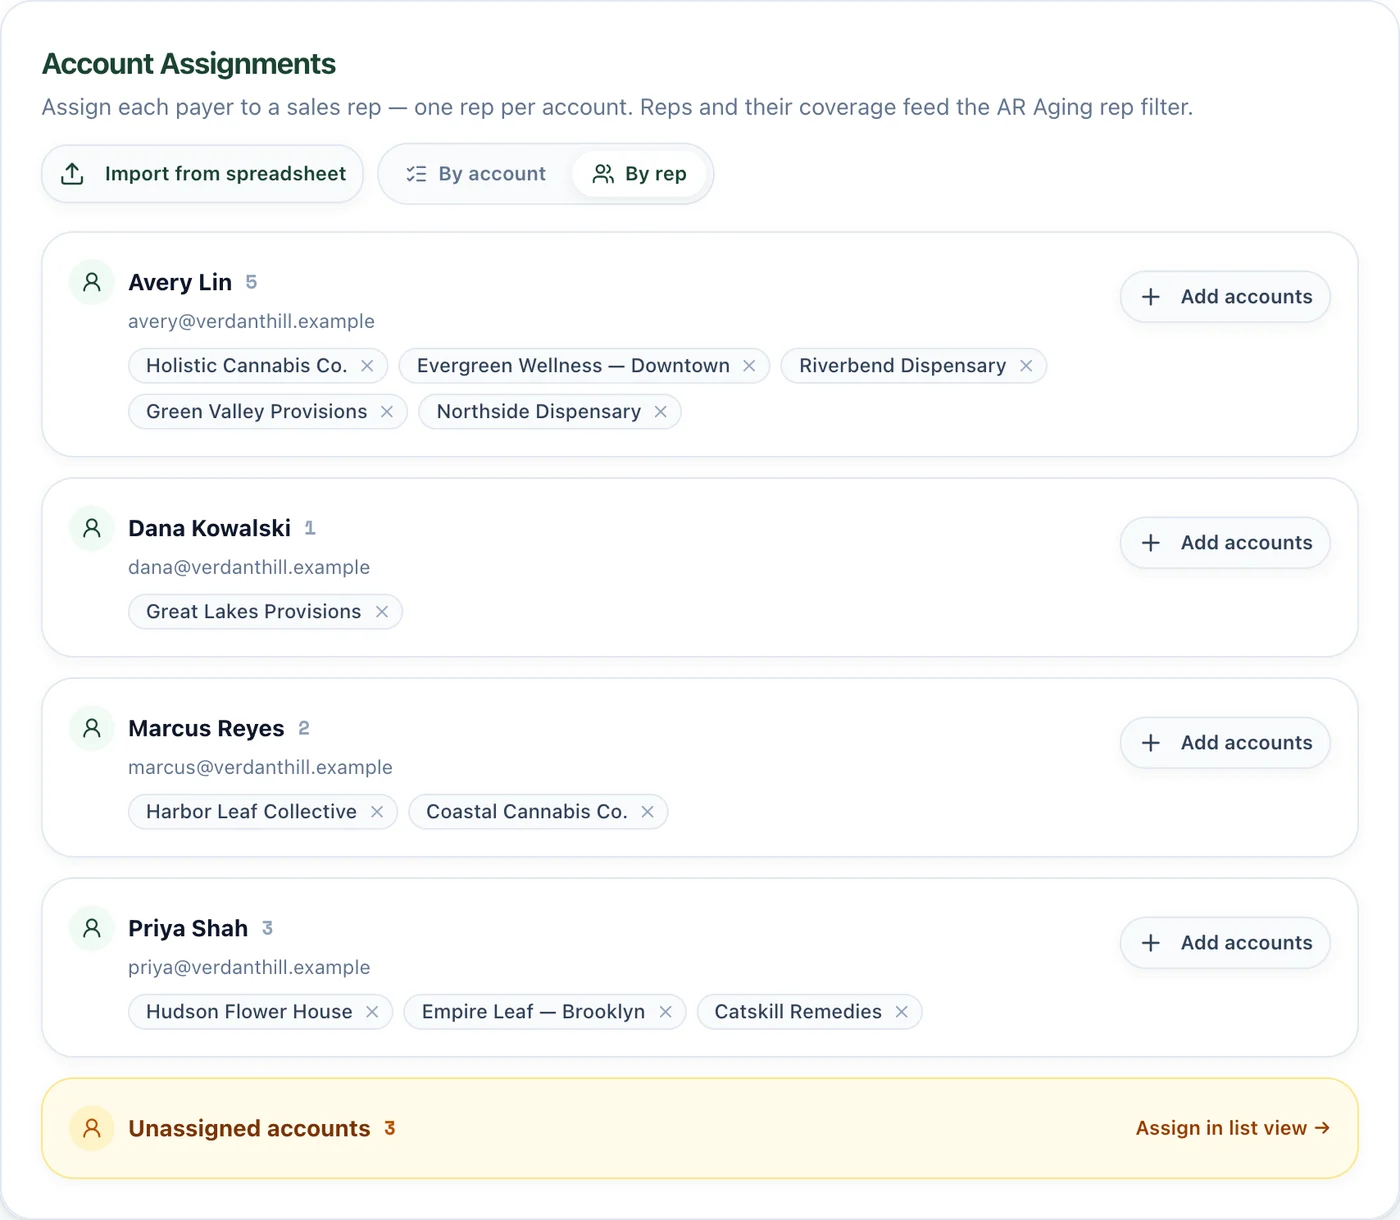
By rep: each rep's book, with Add accounts.
Already keep this in a spreadsheet? Use Import to upload it (Excel or CSV). The platform matches each account, creates any new reps by email, and shows you a preview of every change, plus anything it couldn't match, before you apply it.
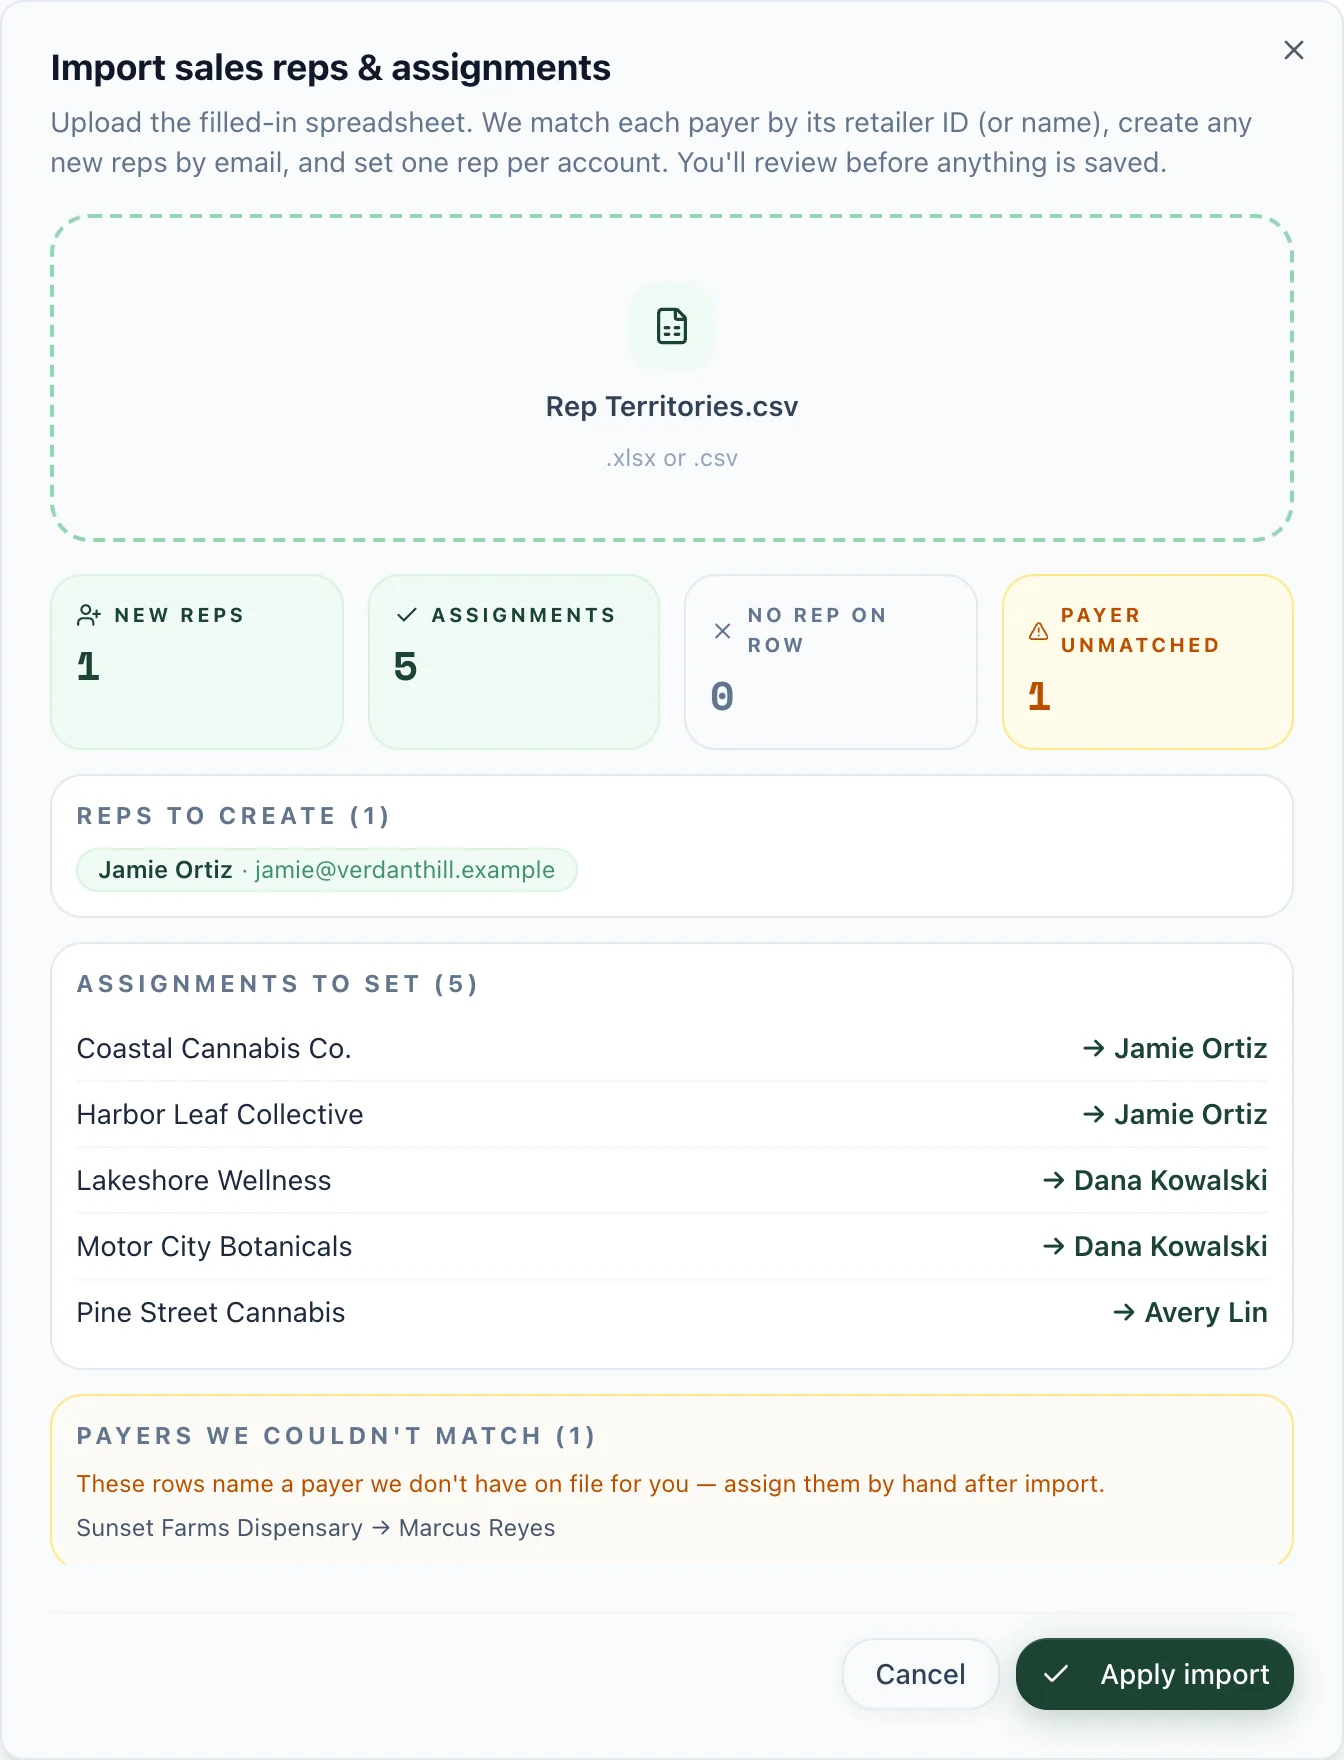
Import preview. Nothing is saved until you click Apply import.
Filter AR Aging by Sales Rep
On your AR Aging screen, the sales rep filter narrows the aging buckets and the invoice list to one rep's accounts, or to Unassigned. Use it in a Monday sales meeting to go rep by rep through who owes what, or to spot accounts nobody owns yet.
The Weekly Collections Email
Assignments also drive the weekly sales rep collections email. Every Monday, each rep gets every open invoice on their accounts, oldest first, with one-tap Text and Email buttons that send the buyer a pay link. Accounts with no rep go to your AR contact, so nothing falls through. It's part of ShelfCollect.
For Retailers: Assign the Rep You Actually Work With
If you're a retailer, you don't manage anyone's roster — but you can control which of a vendor's reps is tied to your account. Open that vendor on its detail page in the retailer portal and look for the Your Sales Rep panel. It shows the rep ShelfSpace currently resolved for you, whether that came from an explicit assignment or the state-coverage default.
To change it, use Assign Rep and pick from the vendor's roster. You can add more than one rep, mark one as Primary (or Make primary on an existing one), and remove any rep you don't want on the account. Because an explicit assignment always beats the state default, this is how you say, plainly, "this is the person we deal with" — which makes sense, since you're the one who knows who you actually work with day to day.
What Happens Next
Once a primary rep is in place, the platform automatically CC's them on the account's key emails, so they stay in the loop without anyone forwarding anything. Specifically, the primary rep is copied on:
- The settlement notification — sent to the vendor when a new settlement is ready.
- The "You Got Paid" payment notification — sent to the vendor when a payment goes out.
That's the entire point: the right rep, looped in automatically, on every account — no manual CC'ing, no wondering who owns the relationship.
Want the right rep looped in on every account? Let's talk.
Talk to Us